This is one of a pair of posts designed to help new riders climb. I looked at pedaling and shifting in Hill Climbing 101. In this post I’ll examine some riding techniques that can improve your ability to climb hills.  There are many different approaches to climbing and riders at different stages of development will tackle a climb differently. A new rider who is desperate to survive to the crest will climb very differently from an experienced racer trying to drop the competition on the steepest part of the climb. Hill Climbing 101 and 102 are written for the relatively inexperienced cyclist who might benefit from some information about basic climbing techniques.
Drop your heels. To get a sense of what this feels like, move your leg so that your foot is at the bottom of the pedal stroke. With your foot in this position, keep the ball of your foot motionless on the pedal and tilt your foot so that your heel is lower than your toes. You’ll feel the stretch in your calf muscles and achilles tendon. Try and keep your foot in this position all the way around the pedal stroke but especially on the downward push. Keeping the heels low brings more of the hamstrings (the muscles in the back of the thigh) and glutes (the muscles in the butt) into play. These are very powerful muscle groups – use them to get you over the hill. Pedaling with the heels dropped is relatively easy when your feet are attached to the pedals by clipless pedals. It’s much harder to do, but still possible, if you are using basket-style toeclips or no clips at all. Many riders tend to point their toes downward which puts less stress on the hams and glutes and more on the quadriceps (the large muscles on the front of the thigh) and calves (frequent calf cramping is a good indication you’re pointing your toes down). This tendency can be accentuated by the use of toeclips. If you’re doing this, try to break the habit and drop your heels when you climb.
Change working muscle groups. As you labor up the hill the muscles you are using will become exhausted as waste products produced by your straining muscles accumulate faster than they can be carried away in the bloodstream. It doesn’t take long to clear these waste products if you can make less use of the muscles for a moment. You can’t coast on a climb, however, because you’ll lose your momentum or come to a dead stop. The solution is to briefly work different sets of muscles throughout the climb to give particular muscle groups precious time to recover. There are several ways to do this. If you typically ride with toes pointed down or feet flat, drop your heels for a bit to bring your hamstrings and glutes more into play and give your quadriceps and calves time to recover. Likewise, if you usually ride with your heels dropped, raise them so your feet are flat or point your toes down thereby taking the load off the hams and glutes and shifting it onto the quads and calves. Shift forward and back on the seat. Sitting on the front of the seat accentuates the quads, sitting on the back accentuates the hams and glutes. Stand up for a brief interval and then sit back down. Just before you stand, shift into a bigger gear and then shift back to the smaller gear when you sit down. You will have more power when you stand and if you stay in the smaller gear you will lose momentum. Use these techniques for 10 to 30 pedal strokes periodically throughout the climb to buy recovery time.
Remain seated while you climb. Standing is terrific for short bursts of power or for a change in muscle use (and hence a bit of muscle recovery) on a very long climb. However, it is less efficient than sitting and will tire you out faster in the long run. You will be stronger at the end of the ride if you climb sitting at the beginning. Less efficient to begin with, standing becomes much more inefficient if your technique is not good and good standing technique is much harder than it looks. Many riders with poor technique weave back and forth across the road when they stand and thrash back and forth, twisting at the hips. This wastes a lot of energy (which you will wish you had 20 miles further on down the road) and is hard on the lower back possibly leading to back soreness or tightening on long rides. Experienced riders are likely to disagree with this advice to climb while seated because standing on the climbs is a standard practice among advanced riders. Having developed the ability to climb efficiently while standing is one of the many skills that separates the advanced rider from the novice. If you stick with road cycling, you’ll learn to climb in a standing position but when you’re just starting out, I think it’s better to learn to climb efficiently and well while sitting before learning the more difficult skill.
Keep a loose, relaxed grip on the handlebars. As you strain up the hill it’s easy to grip the handlebars harder and harder. White knuckling the handlebars like this can lead to numbness in the hands. More importantly, the tension in the hands will spread up the arms to the neck, shoulders and chest. Tightness in the chest will restrict breathing which will reduce oxygen consumption. Oxygen is essential for both removing waste products and bringing fresh supplies of energy to your working muscles. Your legs will tire more quickly and you’ll have a harder time finishing the climb if you are not breathing freely.
Keep your momentum as long as you can. On short or rolling hills keeping momentum is often the difference between an easy climb and a hard one. If you are approaching a hill from a flat road, build up some speed on the flat so you hit the bottom of the hill moving fast. Maintain a constant effort when you hit the hill. As the gradient steals your momentum, downshit to easier gears to keep your momentum going as long as you can. You will quickly learn to recognize the point on a climb when your forward momentum dies and the climb turns into a pure grunt and you’ll want to prevent that from happening for as long as possible. If you are riding a series of rolling hills, make use of the preceding downhill to build momentum for the next uphill. Don’t coast on the downhills. This will come naturally if you are trying to maintain a constant effort (see Hill Climbing 101) as you will be gearing up and accelerating throughout the downhill. If you want to put out extra effort, squeeze out every last bit of speed you can on the downhill where it’s relatively easy so you don’t have to work so hard on the following uphill. As your skills increase you will find that you can fly over hills that once gave you trouble by building the speed you need at the base of the hill and by conserving momentum through the climb by downshifting at just the right moment.
Ride with rhythm. Many climbs are too long or too steep to be conquered with momentum. When you’re on one of these, try and find a rhythm that you can ride at comfortably. Essentially this means finding a cadence that feels right and then using your gears to maintain that cadence as the gradient fluctuates over the course of the climb (see the sections on cadence and maintaining a steady effort in Hill Climbing 101). The right cadence will feel like a natural, comfortable rhythm. Shift into a bigger gear when the gradient relaxes and into a smaller gear when the hill steepens to maintain that rhythm. Don’t worry about what other riders are doing, find your rhythm and stick with it.
Don’t coast after the crest. There are going to be times when you crest a hill in agony. Your legs are screaming for relief, you are in oxygen debt and panting uncontrollably, and all you want ot do is make it stop. You’re over the top and now gravity is your friend as it carries you down the other side. You can coast for a minute; it’s your reward. Don’t do it. Keep your legs turning and shift into a higher gear so that you’re getting some resistance from the pedals. The terrible burning feeling in your legs is produced by the buildup of waste products in the muscles you just overworked. If you coast and stop using the muscles, those waste products just sit there causing you pain. If you continue to use the muscles, gently in comparison with what you just did while climbing, the contraction of the muscles will squeeze the waste products out into the bloodstream where they can be carried away. If you keep pedaling, the pain ends sooner.
Practice on every hill. It doesn’t matter how long or short the hill is or how large or small the gradient is. You can always find something to practice and it’s easier to be successful on the small hills than the big ones. Use every hill as an opportunity to get better. Success on the small hills today will lead to success on the big ones tomorrow.
Never quit on a hill. Never. I don’t really know if this is sound advice or not. It makes sense and it works for me but anecdotal evidence like this is never worth much. Here’s the advice anyway. You’re going  to suffer on climbs. Maybe you went too fast on the early part of the climb and went into the red zone, maybe you blew a shift and killed your momentum, maybe you just don’t have enough left at the end of a long ride to take the climb in stride. Whatever the cause, you are going to suffer. The temptation to give up on the climb will be overwhelming. Don’t do it, fight to the end, pay the price. Suffer. A lot of learning to climb is about training the body but some of it is about training the mind. To be the kind of rider who doesn’t quit, you have to practice not quitting. If you’re a road rider for any length of time, sooner or later someone is going to challenge you on a climb. If their skill and fitness levels are so far beyond yours that it is no contest, they’re a jackass who has no business challenging you in the first place. Ignore them. However, if the riders are close in skill and fitness it usually comes down to heart and will. Who will endure the greatest amount of suffering and not break. If you have refused to quit on every hill in the past, you know that no matter how bad it gets, you’ve been through it before. You didn’t quit then, so don’t quit now. Believe me, the first time some guy challenges you on a hill and you break him and drop him in the last 100 meters of the climb it will all have been worth it.
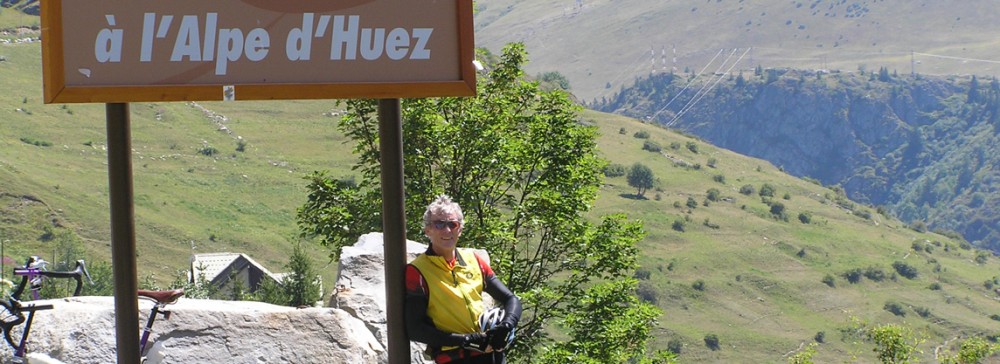
 great Tour de France climbs in the French Alps like l’Alpe d’Huez and the Col du Galibier. I’ve also ridden 30 miles of prairie road that was dead flat and straight as an arrow. If given the choice, I’d ride the climbs every time. Climbs are the yardsticks by which experienced cyclists measure themselves while new riders often look on them with fear and loathing.